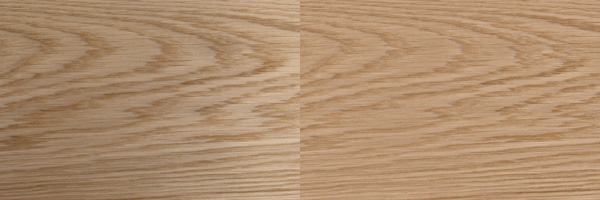
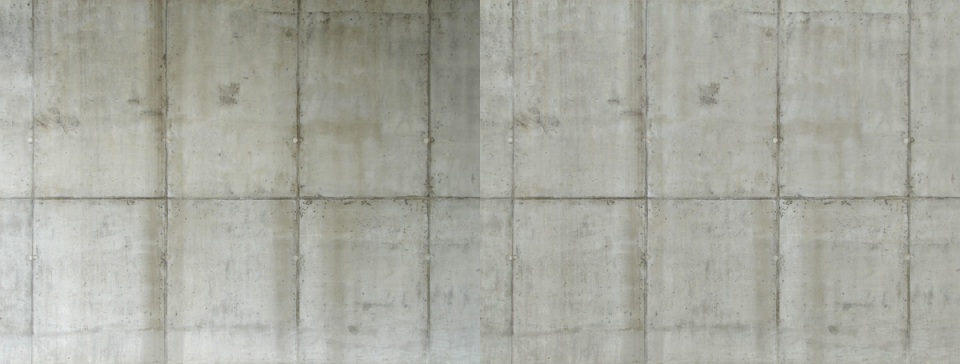
Isn’t it a beautiful concept to make textures using DSLR cameras? It is, until you won’t place them on a big surfaces and hit tiling problems like uneven brightness, visible seams, color shifts etc. There are few tricks to deal with these problems though. One of them was recently showed here. It inspired me to write this post and show you how I prepare my textures before I make them tileable.
Personally I rarely use Photoshop to paint out tiling. Programs like Pixplant or Imagesynth let you make tileable textures automatically using seed images. Although it’s not a perfect solution for wood and other organics, it can save a lot of time. Basically, you can take few photos of a surface, import it and get a tileable output with just a few clicks. Theoretically it works with all “raw” photos but practically it’s better to invest more time and prepare them carefully before importing. Making them even in terms of color tone and overall brightness will pay off in the end.
I’d like to show you the way I equalize my seed images using layers in Photoshop. But firstly I have to admit that it’s based on this mini tutorial by Peter Guthrie. To be honest I just couldn’t grasp it fully so I started to mess around with layer blends and eventually developed my own technique. The goal was to minimize the amount of steps.
Step by Step
- Download Image 1 (Large) from this page
- Open it in Photoshop
- Duplicate Background layer [ Ctrl-J ]
- Open Filter > Blur > Average…
- Double click Background layer to change it into movable layer.
- Move it to the top of the stack, change it’s opacity to 50% [ 5 ] and blending mode to Linear Light
- Open Filter > Other > High Pass… and play with Radius parameter to control the effect
Note: If you’re using the latest Photoshop version you may need to click “Show All Menu Items” in order to access Average and High Pass…
Radius of 100 works just fine in most situations but you might want to tweak it in the range of 50 – 150 depending on image resolution and size of detail.
Actions
I use this trick a lot, 90% of my textures are equalized and as you imagine, it’s not very handy to go through all these steps each time I edit a seed image. Turns out you can easily automate the process using Actions, so now it’s a single clicker!
Examples


Cheers 🙂

Hey man…Great thanks for this little tutorial…It works really good!
Thanks for share it. 🙂
What the hell XD
I was just at a site i usally visits and there was a link to this… and like i have been here many times before and have it bookmarked and everything. The internett is small after all 🙂
Thanks for the tutorial by the way.
Thanks man! It is very useful.
great tutorial! was going to do a proper one myself, but now I might just direct people here 😉
Glad you like it and thanks for your explanation on Flickr!
Thank you! It is very useful.
thanks, I always wondered how they did it
Thank you very much. Very helpful.
Pawel, Peter… you two guys rock!! Thanx so much 😉
Cheers 😉
Just tried it and… damn! Great one. Thanks. 🙂
Tego potrzebowałem. Proste i skuteczne. Dzięki.
pozdr
Prot
Featured here
http://www.refractivesoftware.com/forum/viewtopic.php?f=21&t=323
Very nice trick !
I didn’t knew about that, its so simple yet so effective 🙂
Anyone have a similar process for Gimp?
Hi guys! I’ve more simple method 🙂
In Adobe Photoshop
1. Change color mode to LAB color
2. Select Lightness channel
3. Apply HighPass filter to this channel and play with radius
4. Change color mode to RGB
That`s all 🙂
Hi, thanks for sharing your method 🙂
I did some testing and found it works much different than the one I described. It seems to leave color information intact. This may produce some color ghosting on highly saturated textures, but I guess this may be a nice alternative for all these cases in which my method fails. Definitelly worth creating another action.
Wow! Thanks so much for posting this tutorial, it will come in very useful.
Kelly
Nice one 🙂 It’s variation on an old method, but it really works nicely. Thanks for sharing!
b
Modified to allow any layer to be equalized, and keep the original one for comparison.
http://www.home.no/faenskap/equalize.atn
Thanks.
Well, aside from the fact that this isn’t really “Image Equalization”, it’s still one good tutorial. There’s nothing like tileable textures.
Nothing, Nope! Thanks!
thanks tolas! one of the best actions i have ever seen for texturing work 🙂
thanks
Thank you, action works great!
great man…you must be having a huge heart to share a secret like this…
Thanks so much for sharing Tolas! This method far surpasses any others in it’s straight-forwardness and simplicity! 🙂
thanks Tolas, this tutorial is really useful!! cheers
thanks 🙂 ,useful tutorial
It’s MAGIC!
Hi I would like to match textures both in color and light to then tilearlas can help me thanks.
Amazing time saver action!
Thank you and keep up the good work!
BEST TUTO EVER!!!!!!!!!!!!! THANK YOU!!!!!!!!!!!!!
Nice tutorial, simply and very effective!
Thanks man 🙂 ,useful and great tutorial
Reblogged this on F9 To Render and commented:
A fantastic yet incredibly simple tutorial on equalizing brightness when making tiling textures!
wow pretty impressive !
you can also check this little tool to get the right albedo value https://colortarget.wordpress.com/
awesome!!!Thank you
awesome pawsome
Wow, I can’t believe how much time you just saved me. This little tutorial, might just be the best thing I’ve found in months. Thanks man! Thanks a ton.
Thanks to you for sharing this awesome tips and also thanks to google who bring me here !!
Hi! Is the action file still online? 🙂
Check out blog post now. Link is fixed. You will find 2 action files inside. One of them is the original one done by me and the second one was posted by someone here in comments section. The second one is much better!! Enjoy!
The link is down and does not work. Could you please reupload the files again?
Many many thanks for sharing with us.
Its greate
Fantastic post.. I have been looking for something like this for a long time. Huge timesaver and great results most of the time from the PS action. Many many thanks
Awesome tutorial.
10 years later and this is still such a great post. Thanks for keeping it up.
Former Arsenal forward Lukas Podolski is leaving the Turkish giants and moving to Japan.
REAL MADRID have held ‘Positive talks’ with Chelsea star Eden Hazard’s agent about a stunning summer switch to Spain.
Can anybody tell me where’s that “Show All Menu Items” option is?? I’ve been trying to figure it out for the past 10 minutes and I can’t find it! I need to enable it because average blur doesn’t exist in the menus (and high pass somehow does…)
Hello, many thanks for this tuto… very useful
I found that sometime it change the colors…
The color accuracy is very important for me… any suggestion on how to do it with more color accuracy ??
TUrn the image inti a gray grainy soft surface with the subject edges in hig contrast. What’s wrong?
Oh thank you, thank you, thank you so much Paweł! You saved my life from total insanity
How effective are automated texture creation programs like Pixplant or Imagesynth in producing tileable textures from raw images, and what steps should one take to optimize these raw photos before using such programs, especially when dealing with organic textures like wood?